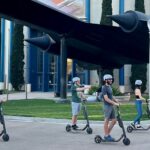
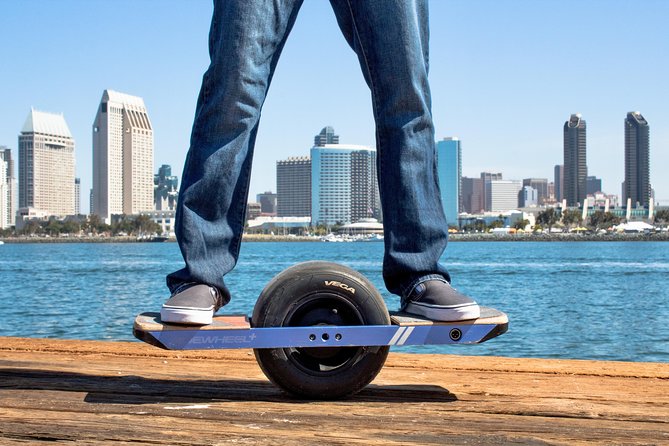
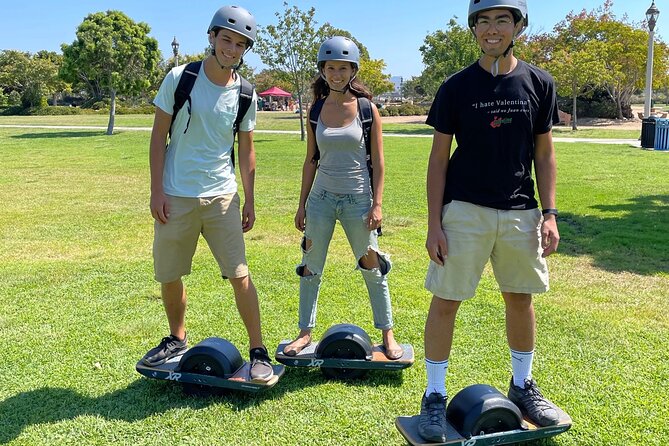
Hoverboarding by the bay feels surprisingly doable. This Onewheel XR lesson turns first-time wobbles into real control while you ride a bike path along the water near Liberty Station.
I like that you get a proper skills intro before you’re sent off, and you’re not stuck in a crowded area while you learn.
The other thing I genuinely appreciate is the coaching style: you start with board layout and controls, then you practice mounting, balance, acceleration, braking, and stability with help right there. You might get an instructor like Jeff or Jesse, and the vibe is calm and focused on getting you comfortable fast.
One watch-out: the first few minutes can feel awkward, and you’ll want good weather since the experience requires it.
In This Review
- Key Things I’d Prioritize Before You Go
- Liberty Station: The Best Kind of “Practice Ground” in San Diego
- Onewheel XR 101: What the Lesson Covers Before You Stand Up
- Safety Gear and Setup: Let the Instructor Do the Heavy Lifting
- The Skills Sequence That Makes Beginners Up to Speed Fast
- The Bay Ride Along Liberty Station: Views, Motion, and a Bit of History
- Small-Group Energy: Why Up to 10 People Helps Your Brain
- Price and Value: Is $79 for 90 Minutes Worth It?
- Who This Hoverboard Lesson Is Best For
- Timing and What to Expect During Your 90 Minutes
- Where to Meet: Find It Easy, Start Calm
- Should You Book the San Diego Onewheel Lesson and Bay Ride?
- FAQ
- How long is the Onewheel Electric Hoverboard Lesson and Bay Ride?
- Where is the meeting point?
- Do I need any previous board sport experience?
- What safety equipment is provided?
- How fast can the hoverboard go?
- How many people are in the group?
- What if the weather is bad or I need to cancel?
Key Things I’d Prioritize Before You Go

- Small-group setup (up to 10): You get more attention and less waiting around.
- Safety gear included: Helmets, knee pads, elbow pads, and wrist guards are provided.
- Structured skills practice: You’ll work on control, acceleration, braking, and stability before the bay ride.
- A beginner-friendly route: Liberty Station water-adjacent paths with minimum pedestrian traffic help you learn.
- Real tech training: You’ll go over the Onewheel XR’s design, layout, and technical specs before you ride.
Liberty Station: The Best Kind of “Practice Ground” in San Diego
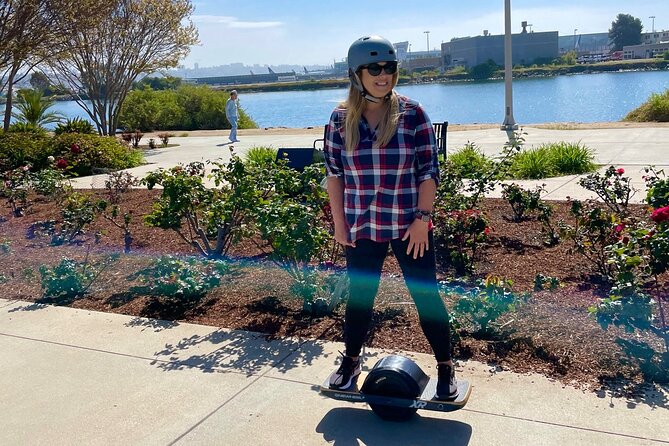
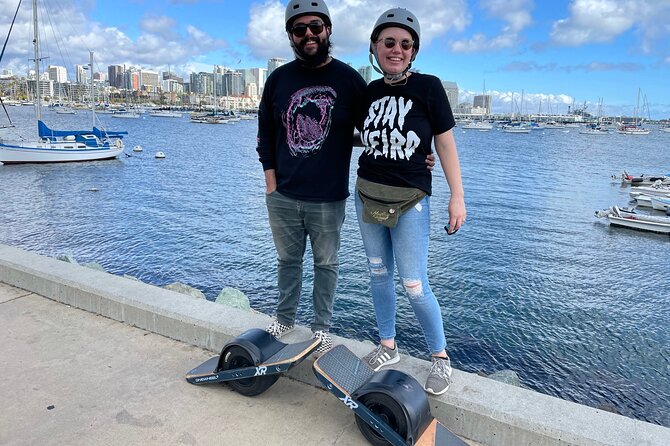
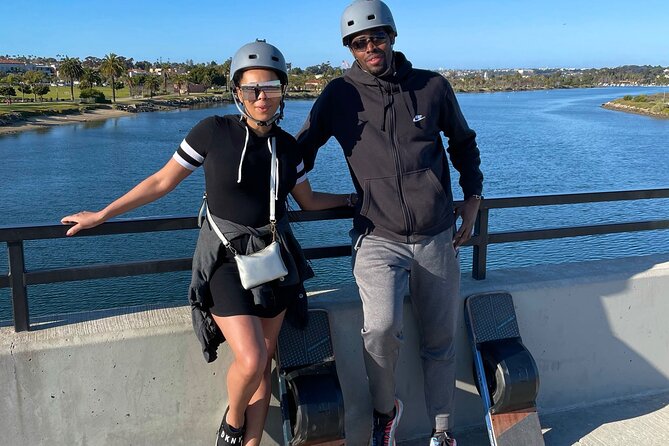
Liberty Station is one of those places that works for a lesson because it’s outdoors, scenic, and built for walking and biking. You’ll ride along the water using a bike path style route, and that matters because it’s easier to focus when you’re not constantly dodging foot traffic.
I also like that the setting makes the whole 90 minutes feel like a short adventure instead of a class you can’t wait to escape. You’re in the Arts District Liberty Station area, and the ride also includes a loop around the park and bay so you get views without it turning into a long slog.
Now, the reality check: you still need balance and attention. The board can move up to 18 mph, so once you’re confident, the fun ramps up, but you’ll start slow and build from there.
You can also read our reviews of more tours and experiences in San Diego.


Onewheel XR 101: What the Lesson Covers Before You Stand Up
Before you put a foot on the board, you start with the basics of how the Onewheel XR works. Expect the instructor to explain the board’s design, layout, and technical specs, then translate that into what you need to do as a rider.
This is more useful than it sounds. When you understand what the board is doing, you stop fighting the ride and start steering it. You also get clear guidance on safe, effective operation instead of guessing your way through.
If you’ve never ridden a hoverboard or skateboard-style device, that early “why” part helps a lot. It’s the difference between feeling out of control and feeling like you’re learning a system.
Safety Gear and Setup: Let the Instructor Do the Heavy Lifting
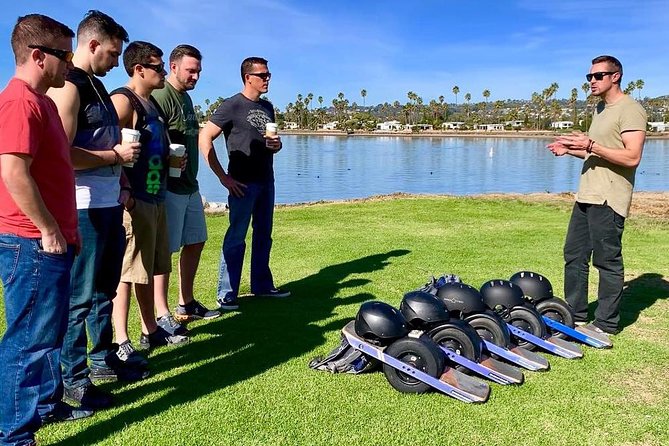
You don’t have to hunt for protection gear. Helmets, knee pads, elbow pads, and wrist guards are provided, and the point is simple: you’ll learn faster when you’re not worried about painful mistakes.
The instructor also assists with mounting and dismounting, especially for your first attempts. That support matters because most first-timers don’t fail from lack of bravery, they fail from not knowing where their weight should go at the start.
You’ll also get help during your first balance moments. That means you’re not just told to go stand there and figure it out. The lesson is set up so you try, get feedback, adjust, and try again.
The Skills Sequence That Makes Beginners Up to Speed Fast
This experience is built around a progression: control first, then speed, then confidence. The way it’s taught keeps you busy in a good way, without dumping you straight into the deep end.
Here are the core skills you practice, and why each one matters:
- Control and stability: This is your foundation. If you can stay steady, everything else becomes easier.
- Acceleration: You’ll learn how to start moving smoothly and avoid jerky power that throws off balance.
- Braking: Knowing how to slow down confidently is what makes learning feel safe.
- Board stability in motion: This is where you stop thinking about the board under your feet and start focusing on your path.
The ride segment doesn’t start until you feel comfortable. That’s a big deal for first-timers because the instructor is managing the pacing so you don’t get overwhelmed. You’ll be assisted at the start, and then you’ll spread your wings once the basics click.
The Bay Ride Along Liberty Station: Views, Motion, and a Bit of History
Once you’re ready, you follow a route that keeps the learning curve in mind. You’ll ride along a bike path from Liberty Station Park along the water, and the plan is to keep pedestrian traffic low so you can focus on your technique.
You’ll also do a short ride around the park and bay. The guide shares some local natural beauty and history as you go, so the time feels like more than just practice laps. It’s a nice mix: skill-building with scenery that keeps your brain engaged.
One practical note: the board’s off-road capabilities are part of what makes it fun, but your lesson ride is still about controlled, safe movement on the path. So don’t treat it as a surprise terrain course. It’s a guided learning experience first.


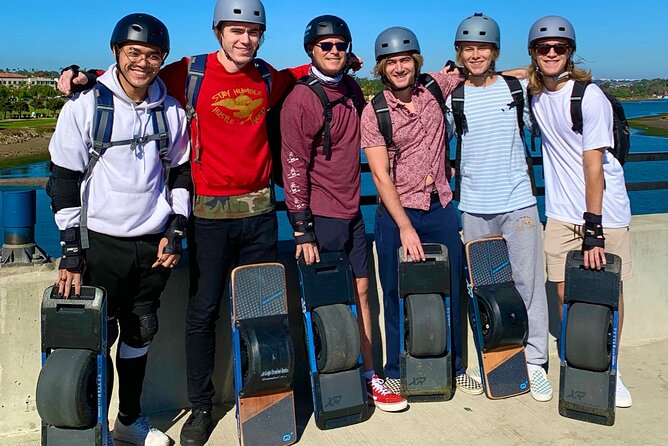
Small-Group Energy: Why Up to 10 People Helps Your Brain
With a maximum of 10 travelers, the class doesn’t get stuck in a line where you wait for your turn forever. Instead, you get frequent chances to adjust and try again with the instructor nearby.
I like that you’re grouped tightly enough for the instructor to notice what’s going wrong. When someone is overcompensating, you can usually fix it quickly with a simple cue. In a larger crowd, that kind of correction is slower and more stressful.
This also helps with first-timer confidence. You can watch other riders while you learn the rhythm, then jump in when you’re ready. And since safety gear is provided, you all start on the same footing.
Price and Value: Is $79 for 90 Minutes Worth It?
At $79 per person for about 1 hour 30 minutes, you’re paying for three things that are hard to DIY well: expert instruction, safety setup, and a guided route designed for learning.
If you’ve ever tried to learn a new device without coaching, you know the trap. You can lose a lot of time figuring out balance and braking, which is where a lesson earns its keep. Here, the structure is built to get you moving on the board as early as possible, without cutting corners on safety.
You also avoid a bunch of friction. You don’t have to bring or rent your own helmet and pads, and you don’t have to worry about finding a beginner-friendly place with low pedestrian traffic while you practice. For many visitors, that’s the real value: less stress, more riding time.
One more point: this activity is commonly booked ahead (on average about 19 days). If you want a specific time window, it’s smart to plan early rather than guessing.
Who This Hoverboard Lesson Is Best For
This is a great fit if:
- You’re a first-timer who wants hands-on coaching instead of trial-and-error
- You want a scenic outdoor experience that’s active but not all-day
- You’re traveling with family or friends who want the same activity, not separate plans
- You like the idea of learning a new mobility tech device at a controlled pace
It can be less ideal if you’re someone who hates feeling awkward while you learn. Early balance is part of the deal, even with excellent instruction. It’s not a “standing still and smiling” experience. You’ll move, adjust, and learn by doing.
Timing and What to Expect During Your 90 Minutes
The tour runs roughly 1.5 hours, and it follows a clear flow. You start with a board walkthrough and safety guidance, then you practice control skills with direct assistance. After that, you move into the ride around Liberty Station and along the water.
Plan to be mentally ready to focus. You’ll be paying attention to posture and control cues, and you’ll improve faster if you listen and apply feedback quickly. Think of it as a short coaching session where your job is to learn the technique, not to rush.
Where to Meet: Find It Easy, Start Calm
You meet at 2753 Cushing Rd, San Diego, CA 92106 in the Liberty Station area. There’s also a GPS pin provided, which is helpful if you’re using a phone for directions.
Getting this right matters because hoverboard learning benefits from starting calm. If you arrive flustered, it’s harder to absorb the first safety and control instructions.
Should You Book the San Diego Onewheel Lesson and Bay Ride?
If you want an active, outdoor San Diego experience that’s beginner-friendly, I’d book this. The combination of structured instruction, provided safety gear, and a route that’s designed for learning makes it feel manageable even if you’ve never tried a hoverboard before.
The biggest reason to say yes is simple: you’re not left alone to figure it out. You’ll practice mounting, balance, acceleration, braking, and stability with support, then ride a scenic bay-adjacent path once you’re comfortable.
If you hate learning stages or you’re going into the trip without good weather conditions, you might want to reconsider. But when the sky cooperates, this is one of those short tours that leaves you feeling like you truly did something.
FAQ
How long is the Onewheel Electric Hoverboard Lesson and Bay Ride?
It runs about 1 hour 30 minutes.
Where is the meeting point?
The meeting point is 2753 Cushing Rd, San Diego, CA 92106, and there is a GPS pin provided.
Do I need any previous board sport experience?
No. The lesson is designed so that no previous board sport experience is necessary.
What safety equipment is provided?
Helmets, knee pads, elbow pads, and wrist guards are provided.
How fast can the hoverboard go?
The board has a top speed of 18 mph.
How many people are in the group?
The tour has a maximum of 10 travelers.
What if the weather is bad or I need to cancel?
The experience requires good weather, and if it’s canceled due to poor weather you’ll be offered another date or a full refund. You can cancel for a full refund up to 24 hours before the start time.